Installing a trampoline in your backyard is a great way to encourage fun outdoor activity for the whole family. With some simple DIY techniques, you can create a customized trampoline setup that fits your space and budget. The key considerations when planning a DIY trampoline project are assessing your backyard size, choosing the right trampoline components, and using safe installation methods.
Assessing Backyard Size
The first step in any DIY trampoline project is to measure the backyard area where you plan to install it. Consider these tips for accurately measuring the available space:
- Use a measuring tape to find the exact length and width of the potential trampoline zone. Make sure to measure from fixed points like fences or walls.
- Account for safety clearance on all sides – most experts recommend at least 6 feet between the trampoline and any structures or obstacles.
- Mark the maximum trampoline boundaries with stakes or spray paint so you can visualize the size.
- Consider sunlight exposure, drainage, and locations of trees or utilities to find the optimal trampoline spot.

Choosing the Right Trampoline Size
Once you know the backyard dimensions, you can select the ideal trampoline size. While large trampolines are fun, limit the trampoline diameter to around 1/3 of the available length and width. This provides sufficient safety margins. Other size considerations include:
- Optimal trampoline sizing for small backyards is 8 to 10 feet.
- Medium backyards can likely fit a 12 to 14-foot trampoline.
- For big backyards, a trampoline up to 16 feet in diameter is suitable.
- Rectangular or oval trampolines can maximize odd-shaped areas.
- Minimize height for very windy regions – lower enclosures have less wind resistance.
Executing Safe Installation
Proper trampoline installation involves anchoring the frame securely to prevent shifting or lifting. Here are some tips:
- Anchor trampoline legs using concrete footings or weighted sandbags.
- Attach the frame to anchor bolts drilled into the ground.
- Use a trampoline anchor kit with metal stakes and ratchet straps.
- Check that the bed is taut and elevated above the ground with a safety pad covering the springs.
Adding a Basketball Hoop
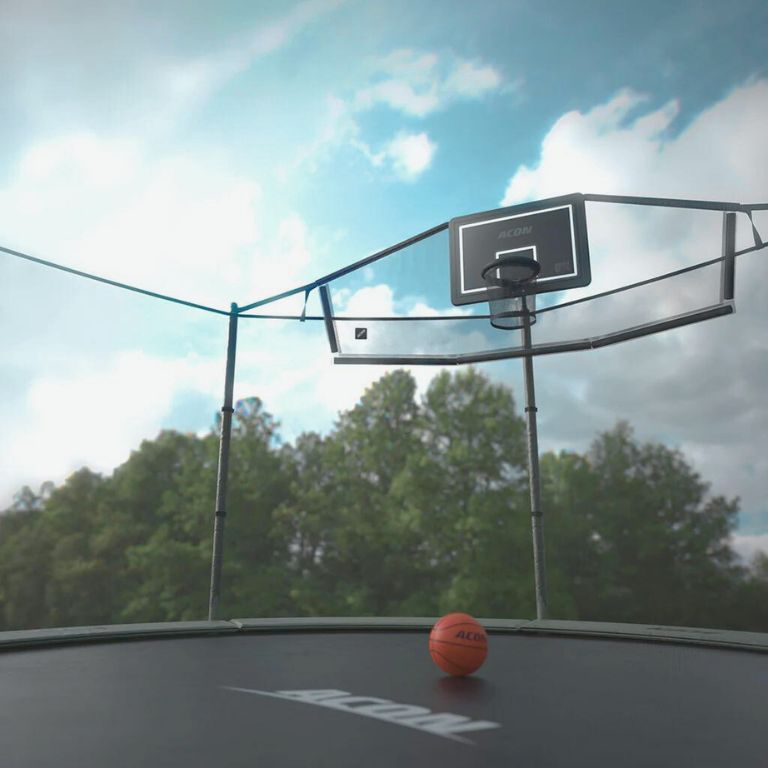
Installing a basketball hoop on your DIY trampoline creates double the fun and challenging bounce shot practice. Follow these steps for adding hoop shooting skills to your trampoline game:

Basketball Hoop Installation
- Choose a trampoline-compatible hoop that secures to the frame with included hardware. Look for rubber-padded backboards and breakaway rims for safety.
- Locate the ideal hoop position on the trampoline by considering jump angles and allowing room for the net tail below the rim.
- Carefully lift and position the hoop against the frame perimeter in the desired spot.
- Attach the backboard braces or pole at the pre-drilled frame connection points using bolts.
- Check that the hoop assembly feels sturdy without wobbling before use.
Safety and Shooting Variations
With your new bounce basketball set up, keep these tips in mind:
- Limit players to one at a time for safety – no simultaneous competitive games.
- Use a foam ball to prevent injuries from errant shots.
- Try trick shots like 180-degree spins, between the leg bounces, and frame banks.
- Take overhead shots from a seated position to reduce risks and difficulty.
Adding a basketball hoop amplifies the entertaining possibilities of a DIY trampoline. Just use caution to prevent injuries as you work on your backboard bank shots.
Building a Trampoline Fort
Constructing a customized fort enclosure around your DIY trampoline creates an imaginative play space for kids. Follow this guide for trampoline fort building:
Fort Construction Materials
- Use tall, flexible poles or PVC pipe connectors as the framework – secure into the ground about 2 feet from the trampoline edge.
- Tie lightweight fabric panels or old sheets to the poles as walls using zip ties or clips.
- Opt. for breathable, transparent panels to prevent overheating while maintaining visibility.
- Add strings of lights or ribbons along the inside for decoration.
- Include roll-up flaps in the walls for easy access.
Safe Design Tips
When engineering your trampoline fort, keep these safety guidelines in mind:
- Check that poles are anchored sturdily and fabric is tied tightly to prevent collapse.
- Ensure adequate overhead clearance so jumpers’ heads don’t hit the roof.
- Use flame retardant materials in case poles or fabric touch hot trampoline surfaces.
- Don’t include horizontal bars or ropes that could snag users.
With sturdy construction and some creative flair, you can build an epic trampoline fort for unlimited backyard adventures! Just focus on safety so your bounce zone remains accident-free.
Illuminating Your Trampoline
Adding lights to a DIY trampoline creates visual excitement and allows jumping after dark. Consider these creative illumination ideas:

Fun Lighting Options
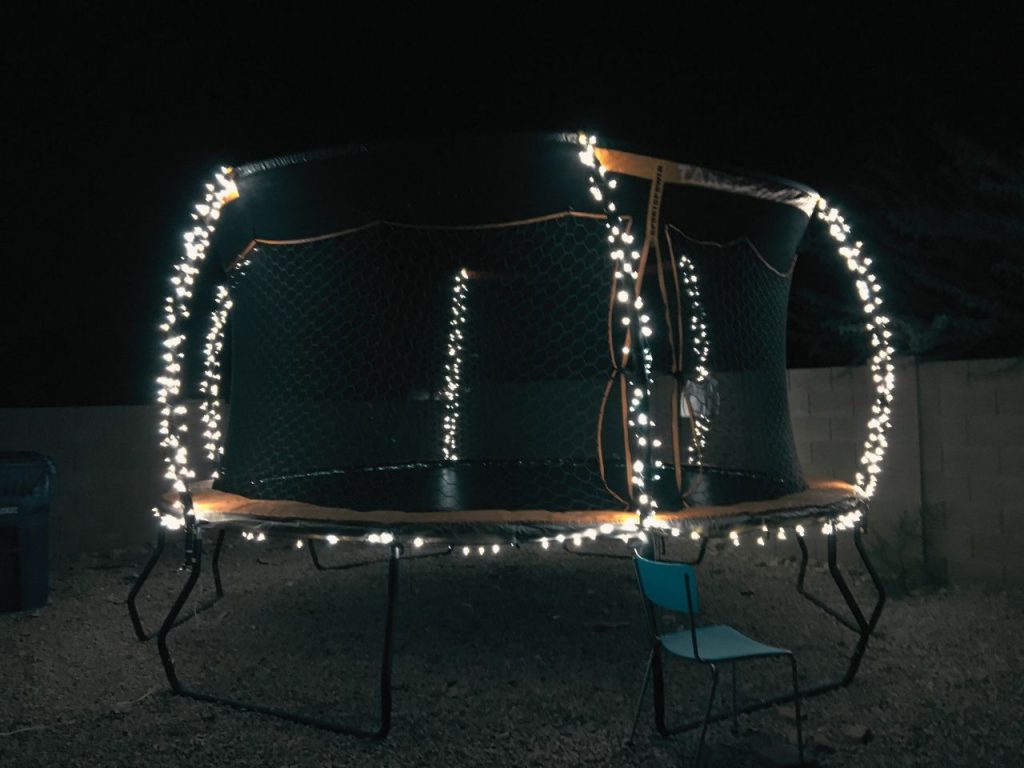
- Outline the trampoline with strands of backyard or fairy lights for a festive glow.
- Hang lanterns or paper lamps from the enclosure netting.
- Install LED strips along frame edges or springs.
- Project patterns or shapes using a motion-sensing light.
- Place luminaries on poles around the perimeter.
Safety Tips
When installing trampoline lighting, follow these precautions:
- Use outdoor-rated lighting to withstand weather exposure.
- Position lights outside the jumping area to prevent hazards.
- Ensure wires are secured tightly and not dangling loosely.
- Link lights to a ground fault circuit interrupter for shock protection.
- Turn off all lighting before dismantling the trampoline.
Proper outdoor illumination allows your DIY trampoline to shine while keeping jumpers out of the dark. Let creativity spark ideas for unique lighting atmospheres.
Indoor Trampoline Transformation
Bringing bouncing fun indoors is possible by converting a spare room or basement into a dedicated trampoline zone. Consider these tips:
- Measure room dimensions to find ideal trampoline size – limit clearance to 2 feet on all sides.
- Use weatherproof trampolines designed for outdoor durability.
- Add padded flooring around the trampoline for safety.
- Install recessed lighting in ceiling and turn up thermostat for comfort.
- Decorate walls with trampoline-themed art and motivational quotes.
Safety Considerations
To build a safe indoor trampoline play space:
- Ensure ceilings are high enough for jumping height.
- Check for and remove overhead hanging lights or fans.
- Securely anchor the trampoline frame to prevent shifting.
- Close the room off from pets or younger children during use.
Outdoor Trampoline Transformation
You can integrate your DIY trampoline into the landscape design through creative hardscaping and plant features:
Landscaping Around the Trampoline
- Build a mulch or pebble “pit” under the trampoline for added safety.
- Construct a gravel or paver patio around the perimeter for users to stand on.
- Plant fast-growing vines on the enclosure poles for a natural look.
- Install rocks or timber retaining walls to add elevation around the trampoline.
Plant Selection and Safety Precautions
When landscaping around a trampoline:
- Avoid thorny plants or trees that could snag users.
- Select shallow-root plants so as not to disturb anchoring.
- Consider fragrant, flowering options to scent the air during use.
With the right hardscaping and plantings, your DIY trampoline can blend sea
Creating a Shade Canopy
Prevent overheating while bouncing with a DIY shade canopy above your trampoline:
Building a Canopy
- Use UV-resistant canvas or shade cloth stretched between 4 tall poles secured in the ground around the trampoline.
- Allow at least 6 feet of headspace between the canopy and trampoline bed.
- Tie fabric to poles with ratchet straps for adjustable tension.
- Add decorative edging along the hem and tassel tie-backs for winds.
Materials and Design Options
Get creative with your canopy style:
- Use bamboo or hardwood for an eco-friendly look.
- Match solid or patterned fabric to your outdoor color scheme.
- Install leaf-style shade sails for airy coverage.
- Add lighting or misters for added ambiance and cooling.
With a custom canopy, you can jump in comfort while protecting your DIY trampoline investment.
Incorporating a Water Feature
Integrating water play into your trampoline area creates refreshing summer fun:
- Place sprinklers or misters along the enclosure poles to spray inward.
- Install an inflatable pool on the ground by the trampoline for splashing after bouncing.
- Suspend a water slide from the trampoline canopy for a thrilling landing.
- Use water blasters or water balloons for active wet play.
With the addition of water elements, your DIY trampoline becomes a lively oasis for the whole family to enjoy all summer long!
Maintenance and Safety Tips
A properly maintained trampoline encourages active play while minimizing injury risks. Follow these guidelines:
Regular Trampoline Maintenance
- Inspect the frame, mat, springs, and poles before each use for signs of wear, rust, or damage.
- Tighten or replace any loose bolts, springs, or attachments.
- Keep mat and poles clear of debris and moisture.
- Wash the trampoline surface with mild soap and water occasionally.
- Disassemble in extreme weather and store indoors when possible.
Safety Guidelines for Trampoline Use
- Allow only one jumper at a time.
- Enforce weight limits for the trampoline size.
- Install safety padding on poles, springs, and frames.
- Supervise children at all times.
- Prohibit somersaults and flips which can cause paralysis.
- Remove shoes, jewelry, drawstrings, and sharp objects before bouncing.
Supervision and Rules for Children
- Set time limits for each child, such as 10 minutes of bouncing.
- Teach fundamental safety rules before allowing children on the trampoline.
- Enforce age limits – most manufacturers do not recommend use under age 6.
- Insist spotters are stationed around the trampoline.
- Require helmets for very young or reckless jumpers.
Conclusion
With thoughtful planning and diligent care, a DIY trampoline can provide years of safe family entertainment. Assess your space, select quality components, utilize secure installation methods, and maintain your trampoline properly.
Let creativity guide design touches tailored to your yard. But above all, emphasize fun and exercise over risky tricks. With shared bouncing enjoyment, your customized trampoline will become a beloved backyard play space.
Last Updated on October 19, 2023

